Wednesday, April 16, 2014

Today a reader, tomorrow a leader!

I am the biggest bookworm. One of my favorite things to do is read a book that is soon to hit the theaters just so I can compare the storylines. The movie is rarely as good which is one reason I love reading so much. This is an enjoyment I plan to force onto my daughter. I long for the days I can curl up with her while reading "The Secret Garden." Right now she just likes to eat the pages which means we will stick with the cardboard books. In hopes of making reading something she loves as much as I do, books will be everywhere. Especially in her bedroom which leads us to our next DIY!

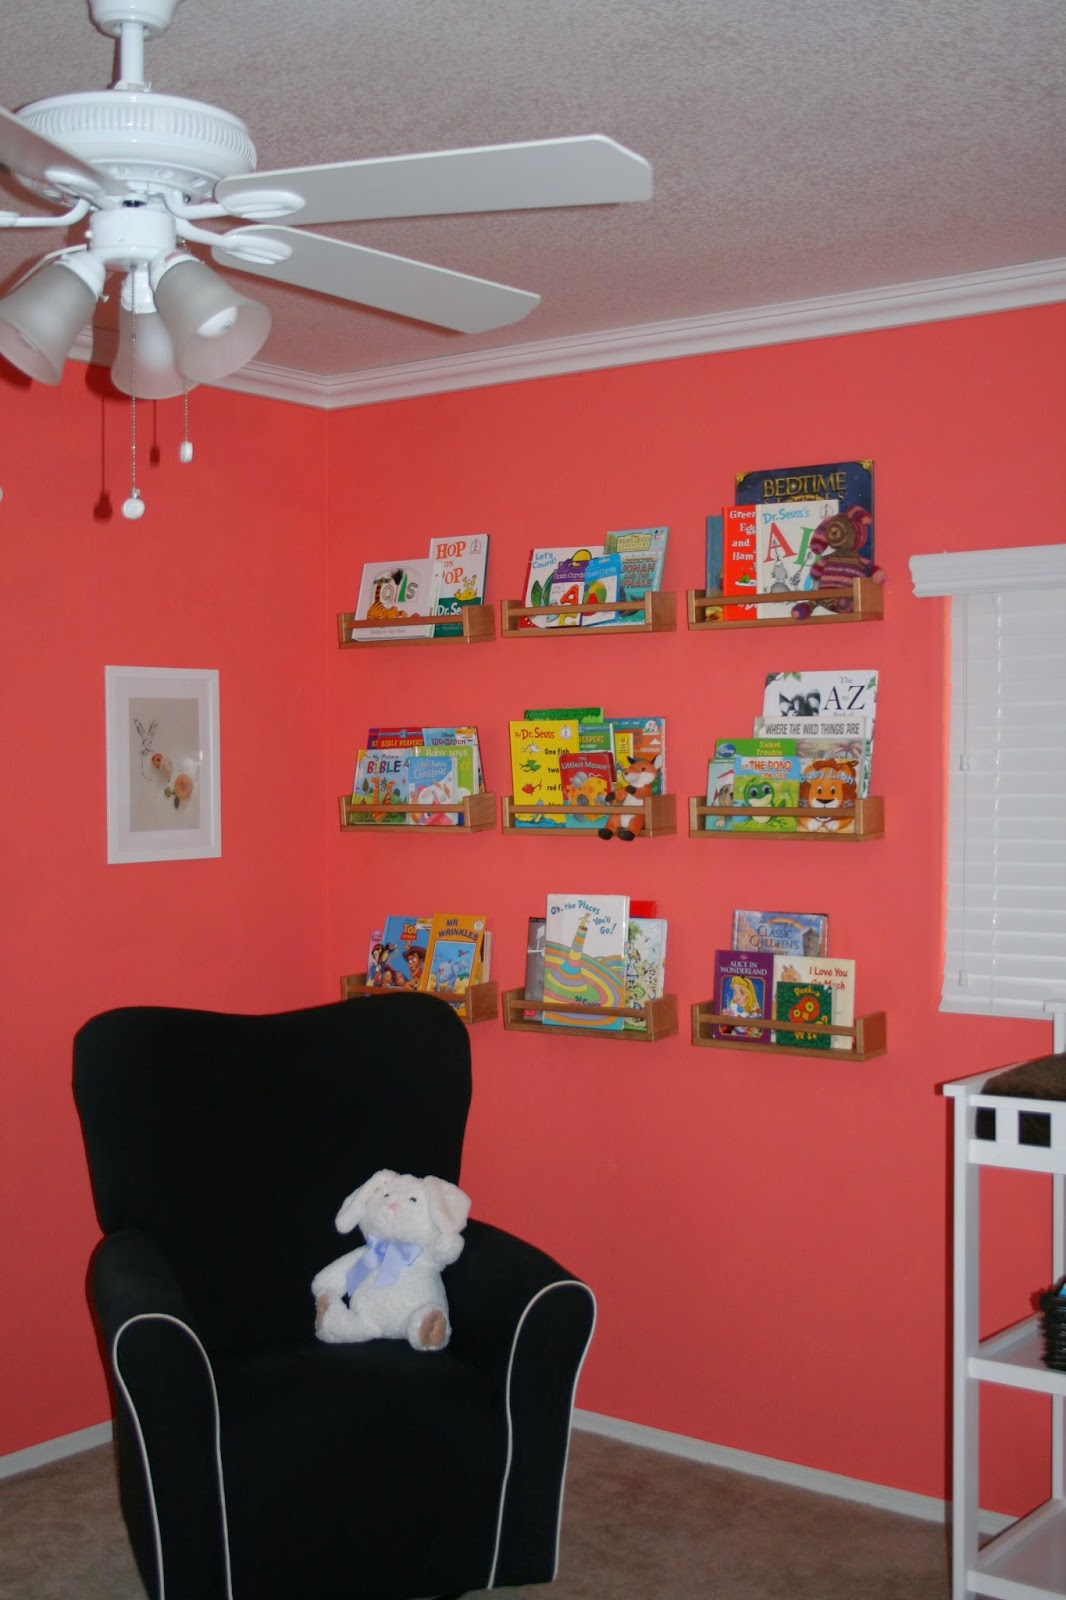
I knew I wanted to make a great book display so again, I headed to Pintrest for book storage ideas. I wanted to keep it simple and cheap. The real star of the show here are the books. I really just needed something sweet and simple to display them on.

To be honest, I feel a little silly even blogging about this project because there is so little to it but none the less it was a DIY and incredibly time consuming.

I started off at the greatest place on earth, IKEA! Oh! How I love me some Ikea. I stumbled across these spice racks. These were a perfect find for me because they were unfinished which are great to paint and they are SUPER affordable! They were only $3.99 each! This allowed me to buy 10 of them.

I considered leaving them the way they were but again, my OCD took over and I decided they didn't blend well enough with her room design. I busted out my paint brushes and my Martha Stewart "Medallion" tinted glaze.
I laid out an old shower curtain liner that I was going to toss anyway and went to work. To be honest, I felt like I was part of a labor camp. If you have ever purchased anything from Ikea, you know their items come in thousands of pieces! Luckily, these shelves did not come in a thousand pieces, only four BUT! I bought ten shelves. I painted over 40 pieces of wood, 2 coats, each side. It was time consuming.


I swear this glaze NEVER dries. I was having to wait at least 12 hours between coats and there were still some sticky spots. This may have been because it was glaze and possibly not the intended purpose. Either way...NEVER DRIES. When it finally did dry the color was beautiful! It was not an overwhelming gold. It was very close to the original wood color but was enhanced and has a sweet glisten to it. My favorite part was that it still maintained wood grain features.

Hanging them was a nightmare and we measured and moved nails around a million times. Eventually we landed on "good enough" and this was our finished product. I ended up painting one too many because we only had room for nine.


Until next time...
 
Bear Hugs,
 
Angie

Tuesday, March 25, 2014

Unbirthday DIY Style

Well...it happened. Despite my kicking and screaming, my baby girl turned one. This is such a bittersweet time. I'm stuck in the constant limbo of wanting her to learn new things while praying she stays little forever. *sigh*
 This is motherhood I suppose. On a lighter and less dramatic note, her birthday was a hit. All of the planning was worth it.

This was a total DIY birthday. There is an amazing park out here called Riverview. This park has everything except decent shade and seating. There are 3 cabanas near the splash pad, and lets face it, my little water baby needed to be near the splash pad. You can only reserve one of them and being that we had about 40 people, a table for 6 would not do! I only had one option...I had to be the early bird. I knew this was going to be challenging because this park is CRAZY crowded! Like...200 people on a weekday crowded. I knew I was going to have to battle people but I'm just stubborn tenacious enough to make it happen.

Oh-my-God-thirty rolls around and I roll my exhausted booty out of bed. I loaded up the car and in the process of packing up, I managed to wake up my parents who were sleeping in my living room. You know  that if a box of soda cans are going to crash to the floor, it is going to be at 5 AM and it's going to be while the rest of the house is sleeping. Sorry!

After loading up and driving, we finally get there at about 6 AM and luckily no one is there except for some drunkards climbing a 60-something foot tower. As long as they leave my cabanas alone, have at it! I gotta tell you...I felt so accomplished. I realize this is one of the smallest situations that will require me to go to bat for my daughter but hey! it's a good start.

So, here are some shots of our DIY Alice in "One"derland party. Enjoy!

Invitations

I wish I could take DIY credit for these because I am so in love with them but I actually got them here.

Guest Book

I have every intention of pushing books on my daughter until she loves them as much as I do. I wanted to do something besides the traditional guestbook. I thought it would be awesome to get her an "Alice in Wonderland" book and have everyone sign it. I made an adorable sign to explain our little process.
Drink Me


This was really simple, not much to it. I found this little bottle at Michaels. It was around 2 dollars. I filled it with water and food coloring and tied a printed tag on with some twine.

Food Labels
I had so much fun with this. I printed off these food labels and framed them in some cheap frames I had hanging around. I just painted the corners of the frames with the paint I love to hate
 (Martha Stewart paint).

March Hare Fare = Fancy way of saying vegetable tray.
Blue Caterpillar Salad = My sister’s amazing pasta salad with noodles we dyed blue.
1.       Cook noodles.
2.       Rinse noodles in cold water.
3.       Put noodles in zip lock with food coloring.
4.       Rinse in cold water.
Cheshire Cat Cookies = Pink and purple cookies. We call them cloud cookies and they are amazing. They are super easy to make. 1 box of cake mix, 1 container of cool whip and 1 egg. That's it!
Down the Rabbit Holes Spirals = Cut up turkey wrap.


The Cake
Instead of doing cake we decided on a personal cake for Aubrey and then cream puff desserts for the guests. I made her a single serving cake and baked it in a mug. I’m pretty sure I’m buying a cake next year! This cake was a pain in the axe but it ended up beautiful (thanks to my sister) and the birthday girl REALLY enjoyed it.


The Centerpieces
I have an entire post dedicated to these and they came out fabulous.


Also! Huge thanks to Danielle Yvonne Photography. She did an incredible job photographing Aubrey's party and made my DIY projects look a lot better than they actually are!


That about sums up our DIY birthday party! It was a great time. So great that our not-so-little girl fell asleep at 5:30 PM!

And so begins the planning of birthday number 2!
Until Next Time...
Bear Hugs,
Angie


Saturday, March 8, 2014

Teapots for an Unbirthday


We've kept Aubrey alive for almost an entire year. We always said we wouldn't go overboard for her birthday since she won't remember it but I couldn't help myself. So, that theory went out the window the second we said it. I adore her and as incredible as this year of her life has been, a celebration of epic proportions is necessary.

I really wanted something elegant. I completely ran away with the "Alice in 'One'derland" theme. My first venture was centerpieces. I must have visited at least 10 thrift shops looking for the perfect tea pots and tea cups but I wound up with heinous looking teapots. I can't help but wonder who purchased these new. I mean, everyone needs barn animal teapots, right?
I ended up with a huge assortment. Then off to painting. I really don't know why I do this to myself. Every time I have a painting project I swear I will never paint again. Then as soon as I find something I want but isn't the right color, I pick up the paint brushes and my husband shakes his head.
 
These were quite the task. I wanted everything pastel. So I went to the Martha Stewart paints I love to hate. The colors are incredibly beautiful but they take forever to dry. Forever!!! And each pot needed about 3 to 4 coats. It took...days. After I painted them all and they dried they sat for a few weeks because I was so over this project. Then today I realized her birthday was in 2 weeks and I should probably finish these centerpieces.
 
I hit the Dollar Tree. I knew I wanted to do fresh flowers and then I priced them out. For the amount of flowers I needed it was going to be over $100, fake it is. It ended up costing me $21 worth of faux Dahlias and Daffodils (Aubrey's birth flower). I also picked up a bunch of foam floral blocks.
 
I hot glued the foam blocks into the bottoms of the teacups and pots and went to town sticking my flowers in. Davey helped by cutting the flowers at different lengths.
 
Now, on to the cards. I took regular old playing cards and glued 2 of them back to back and sandwiched them around a floral zip tie and then stuck those into the floral blocks.
The last thing to do was attach some vintage keys I picked up from Michaels for $1 each and I tied those on with some twine that I had hangin' around. And THIS is my final product.
 
 
I don't know how to express how much I love these. So, I'm going to go with 'I freakin' LOVE these.' They are so perfect. They were such a labor of love for me. I absolutely hate painting but I am so glad I did because they came out so beautiful. I'm realizing my style is rustic with a touch of glamour and these are exactly that.
 
Until next time...
 
Bear Hugs,
 
Angie


Saturday, March 1, 2014

Golden Beaver (Oh, the puns!)


Now that we bought a house, I will be doing a ton of DIY projects. Let’s face it, I am far too cheap to buy these items or hire someone to do these projects for me. With that said, my first blog project! I am going to be making a jar for Aubrey Girl’s college fund. I mean, it's not really her college fund, that money is all tied up in a 529 account but this is where we keep all of the change that eventually rolls over to her college fund. 
This is her current change jar. Davey Doodle and I painted it for her while I was still pregnant with her but since I’m redoing her room this sweet little jar no longer matches. If anyone knows me, they know how obsessive I am about EVERYTHING matching and being cohesive.
After spending some time on Pintrest I stumbled across this photo:
 
What a cute deer, right?! Well, being a "use-what-you-have" kind of girl, I remembered I had a plastic beaver figurine in the freezer. That might be one of the strangest phrases I’ve ever used but it's fact. Why do I have a beaver in my freezer? My sister and I think it’s hysterical to hide things around each other’s homes. A plastic banana in the couch, random pictures of Davey taped to the toilet seat or shoved in her pillow cases, a plastic pear shoved in her son’s backpack and so on. Two years later the beaver is still in the freezer, until today that is!
 
Originally I was going to paint the figurine gold and just use the deer picture as inspiration but after MANY failed attempts with the paint (I swear Martha Stewart paint NEVER dries or maybe I just hate waiting for paint to dry. Probably the latter.) I decided to regroup and off to Target I went! I picked up this glitter pack because it was the only glitter they had in the entire store and the fine gold glitter turned out to be exactly what I was looking for.
 
The process was super simple and I didn't have to wait a billion years for it to dry. I used a small paintbrush and painted Mod Podge onto the figurine and then dipped the figured into a bowl of glitter. I did the same with the jar lid. I let them sit for about an hour to dry and then did another layer of Mod Podge over the glitter.
After a couple of hours it was completely dry and I could finally assemble my jar. I hot glued the figurine to the top of the jar and tied a piece of twine around the jar and voila! Done.
 
I actually love it. I always hate my end product because they NEVER look the way I expect them to but this is a little change jar I can be proud of.

Until next time...

Bear Hugs,
Angie